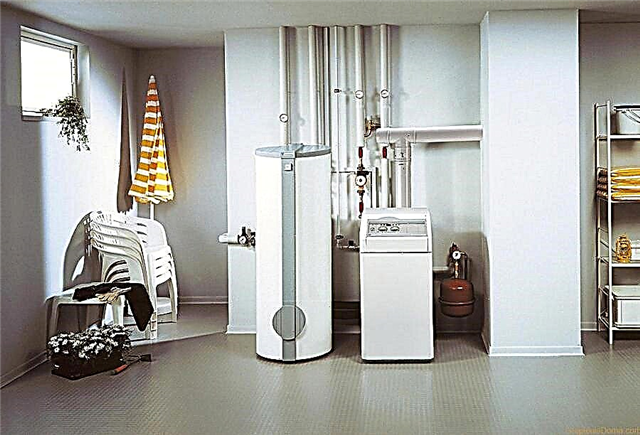
To heat a small living room or a two-story frequent house, it is not necessary to use complex, expensive technologies. The Leningradka heating system, known since the times of the Soviet Union, is effectively used today to provide heat to small residential buildings.
It remains popular due to its simplicity of design and economical consumption of materials. Indeed, you must agree that it is more expensive and more complicated - it does not always mean better.
It is possible to equip a single-tube “Leningradka” on your own. We will help you deal with the principle of the system, give the main technological schemes and describe step by step the technology for installing the heating system. Visual photo and video material will help to plan the implementation of the project.
The principle of operation of the heating circuit “Leningradka”
The appearance of modern heating equipment, new technologies has allowed to improve the “Leningradka”, make it manageable and increase functionality.
The classic “Leningradka” is a system of heating devices (radiators, converters, panels) connected by a single pipeline. The coolant circulates freely through this system - water or a mixture of antifreeze. The boiler acts as a heat source. Radiators are installed around the perimeter of the housing along the walls.
Image Gallery
Photo from
Leningradka is an improved version of one of the simplest heating schemes used to this day in the arrangement of houses of a small area
Devices in this heating variant are connected in series to the collector pipe, the coolant flows from one radiator to another one by one
Heating assembly Leningradka is made using tees, a collectron tube is located around the perimeter of the room
One-pipe heating circuits are characterized by a minimum number of pipes, connectors and fittings, which positively affects the construction budget
Among the heating systems related to the Leningradka scheme, there are open structures with a characteristic open tank. Most often these are gravitational options
In the case of Leningradka, priority is given to closed circuits with a sealed expansion tank, a safety group and a circulation pump, as with a characteristic lower connection of devices, stimulation of the movement of the coolant is required
The construction of the Leningradka system is characterized by a lower connection of heating devices and horizontal wiring. Batteries are equipped with cranes to shut off in case of repair
For the device of Leningradka with the natural movement of the coolant, accurate calculations are required. In this case, the collector pipe is laid only from above, and the coolant flows vertically
One of the simplest schemes for organizing heating
The principle of the device system and instrument connection
Extremely easy to build heating system
The minimum material consumption of Leningradka
Expansion tank for open heating system
One pipe indoor heating system with espanzomat
Common option with bottom connection
Heat transfer in top wiring diagrams
The heating system, depending on the location of the pipeline, is divided into two types:
- horizontal
- vertical.
The piping of the system can be located either below or above. The upper pipe arrangement is considered to be the most effective in terms of heat transfer, while the lower pipes are easier to install.
The lower connection of devices requires the use of a pump, which is why the economic priorities of the system are somewhat reduced. In the upper version, accurate calculation during the design period and the installation of the upper stage are necessary, which increases the length of the pipeline and the cost of its construction.

At the lower connection of the heating devices to the heating main, it is necessary to provide for a narrowing of the pipes in the area necessary for directing the coolant to the radiator
The circulation of the coolant can occur by force (using a circulation pump) or naturally. Also, the system can be closed or open type. We will describe the features of each type of system in the next section.
The one-pipe heating system referred to as “Leningradka” is suitable for single-, two-story residential buildings of a small area, the optimal number of radiators is up to 5 pieces.
When using 6-7 batteries, it is necessary to carry out rigorous design calculations. If there are more than 8 radiators, the system may not be efficient enough, and its installation and refinement may be unreasonably expensive.

The diagonal connection option in a single-tube circuit, although it allows you to increase the heat transfer of the system by 10 - 12%, but does not eliminate the “skew” in the temperature regime between the first ones from the boiler and the extreme batteries
Overview of the main technological schemes
Each of the heating schemes of Leningrad has its own characteristics of practical implementation, advantages and disadvantages, which we will familiarize with below.
Features of horizontal schemes
In one-story private houses or premises of a small area, a Leningradka is usually installed according to a horizontal layout. In the practical implementation of horizontal schemes, it should be borne in mind that all heating elements (batteries) are located at the same level, and their installation occurs along the walls around the perimeter of the premises to be equipped.
Consider the simplest classical horizontal open-type circuit with forced circulation.

On the horizontal diagram of "Leningradka": 1 - a boiler; 2 - pipe; 3 - a tank; 4 - circulation pump; 5 - drain ball valve; 6 - booster manifold; 7 - Mayevsky crane; 8 - radiators; 9 - discharge pipe; 10 - sewerage; 11 - ball valve; 12 - filter; 14 - supply pipe. The arrows indicate the direction in which the coolant moves
The diagram shows that the system consists of:
- Heating boilerwhich is connected to a water supply system and to sewer networks;
- Expansion tank with pipe - thanks to the presence of this tank, the system is called open. A pipe is connected to it, from which excess water comes out when filling the circuit, and air, which can appear when the liquid boils in the boiler;
- Circulation pumpwhich is integrated in the return pipe. It provides water circulation along the circuit;
- Hot water piping and a coolant coolant discharge pipe;
- Radiators with installed Mayevsky cranes, through which the air comes down;
- Filterthrough which water passes before entering the boiler;
- Two ball valves - when you open one of them, the system begins to fill with coolant-water up to the nozzle. The second is secret, with its help, water is drained from the system directly into the sewer.
The batteries in the diagram are connected by a pipeline from below, but you can arrange a diagonal connection, which is considered more efficient in terms of heat transfer.

This diagram illustrates the principle of diagonal connection. The coolant flows from above through a pipeline connected to the top of the radiator, and exits from the back of the device at the bottom
The above scheme has significant drawbacks. For example, if you need to repair or replace the radiator, you will have to completely turn off the heating system, drain the water, which is extremely undesirable in the heating season.
Also, the scheme does not provide the ability to regulate the heat transfer of the batteries, reduce the temperature in the premises or increase it. The advanced scheme below solves these problems.

The main difference between the scheme and the previous one is that ball valves (highlighted in blue) were placed on the pipelines on both sides, and bypasses with needle valves (highlighted in green) were introduced into the lower pipe.
Ball valves mounted on both sides of the battery are introduced in order to be able to shut off the water supply to the radiator. To dismantle the battery for repair or replacement without discharging water from the system, ball valves can be shut off.
Due to the presence of bypasses, the removal of the battery can take place without shutting down the system - water will pass along the circuit through the lower pipe.
Bypasses also allow you to adjust the amount of coolant flow. If the needle valve is completely closed, the radiator receives and gives off the maximum amount of heat.
If you open the needle valve, part of the coolant will pass bypass, and the other part will pass through the ball valve. In this case, the volume of coolant entering the radiator will decrease.
Thus, by adjusting the level of the needle valve, you can control the temperature in a particular room.
Consider a horizontal closed heating circuit with forced circulation.

The figure shows the implementation of the closed circuit “Leningradka” with forced circulation. The heated coolant is supplied with one collector pipe, which collects the cooled water and discharges it into the boiler for further processing
Unlike an open circuit, a closed type system is under pressure due to the presence of a closed expansion tank. Also in the system there is a control panel.
It consists of a housing on which to install:
- Safety valve. It is chosen based on the technical parameters of the boiler, namely, according to the maximum allowable pressure. If the temperature regulator breaks down, then excess water will come out through the valve, thereby reducing the pressure in the system.
- Air vent. The device removes excess air from the system. If the thermal control system fails, then when the liquid boils, excess air will appear in the boiler, which will automatically exit through the air vent;
- Pressure gauge. A device that allows you to control and change the pressure in the system. Usually the optimal pressure is 1.5 atmospheres, but the indicator may be different - usually it depends on the parameters of the boiler.
A closed system is considered the most modern solution due to the automation of some processes.
Image Gallery
Photo from
Circulation pump in a single pipe heating system
Safety group for pump heating
Automatic radiator air vent
Balancing fitting with bypass and ball valve
Application of vertical schemes
Vertical layouts of the Leningradka installation are used in two-story houses of a small area. By analogy, they can be open or closed type, represented by circuits with forced circulation and with gravity.
Systems with a circulation pump we have given above. Consider a vertical circuit with a natural circulation of a closed type.

In the diagram, the pipeline is located vertically, and water is supplied from top to bottom through the expansion tank
Implementing a circuit with natural circulation is quite difficult. Here, the pipeline is mounted in the upper part of the wall at a certain angle in the direction of water movement. The coolant flows from the boiler to the expansion tank, from where it moves under pressure through pipes and radiators.
For efficient operation of the system, the boiler must be located below the radiator installation level.
The scheme may also provide for the possibility of removing radiator batteries without stopping the heating system by installing bypasses with needle valves and ball valves on the pipeline.
Comparison of gravity and pumping systems
It is believed that the organization of a gravity heating system allows you to save on a circulation pump.
In order to organize the natural movement of the coolant along the circuit, it is necessary to correctly calculate the inclination angles, diameter and length of the pipes, which is not easy to do. Moreover, a self-flowing system is capable of smoothly and efficiently working exclusively in small single-storey rooms; in other houses, its operation can cause a number of problems.
Another drawback of gravity flow is that its organization requires pipes with a diameter larger than when constructing forced heating circuits. They are more expensive and spoil the interior.

The diagram shows the implementation of gravity for horizontal wiring. Here, the boiler is located below the level of radiators, the coolant rises through a strictly vertically oriented pipe, enters the expansion tank and from there, through the booster manifold, enters the radiators
The basement for the boiler should be equipped in the room, since the heat source should be located below the level of radiators. Also, for the organization of gravity, you will need a well-equipped and insulated attic, on which an expansion tank will be mounted.
The problem of any gravity flow in a two-story house is that on the second floor the batteries heat more than on the first. The installation of balancing cranes and bypasses will help to partially solve this problem, but not significantly.
Moreover, the introduction of additional equipment leads to a rise in price of the system itself, and its operation may remain unstable.
The most rational solution to the issue of the difference in temperature of the coolant leaving the boiler and reaching distant appliances on the ground floor is to install radiators with an increased number of sections.
An increase in the heat transfer area in this way makes it possible to practically level the characteristics of heating on different tiers of the system.
The self-flowing "Leningradka" is not suitable for attic-type houses, because it is only possible to position a pipe only in a house with a full roof. Also, the system can not be implemented if people live in a house unstable.
Image Gallery
Photo from
Principle of natural movement
Restrictions on the length of the systems
Acceleration section of the manifold pipe
The specifics of the installation of the heating system
The one-pipe system “Leningradka” is complicated in calculations and execution. For its introduction into the house as an effective heating system, you must first make thorough professional calculations.
The main elements of the Leningradka system:
- boiler;
- pipeline metal or polypropylene (but not metal-plastic);
- sections of radiators;
- expansion tank (for a closed system) or a tank with a valve (for an open);
- tees.
You may also need a circulation pump (for systems with forced movement of the coolant).
To improve the capabilities of the system use:
- Ball Valves (there are 2 ball valves per radiator);
- bypass with needle valve.
It should be noted that the main line of the system can be sharpened in the plane of the wall or located on top of this plane. If the pipe is in a wall, ceiling or floor, it is important to ensure its thermal insulation with any material. Thus, the heat transfer of the pipes is improved, and a decrease in temperature in the last radiators will be minimal.

It is possible to install the trunk over the wall, avoiding gating, but in this case the interior of the room suffers
If the trunk is installed in the plane of the floor, then the installation of the flooring itself is carried out above the pipe.If the pipeline is laid over the floor, this will allow in the future to make some changes in the construction of the system.
The feed pipe and the return line of circuits with the natural movement of the coolant are usually mounted at an angle of 2 - 3 mm per linear meter in the direction of movement of water or other coolant in the system. Heating elements are installed on the same level. In circuits with artificial circulation in the observance of the bias is not necessary.
Preliminary work of the premises
If the pipeline is hidden in building structures, then before installation of the system they make strobes around the perimeter in the places where the pipes will be located.
When gating, microcracks form in the wall, through channels appear both outside and inside. This is fraught with the ingress of cold street air and the formation of unwanted condensation on the pipe. As a result, heat losses of radiators and gas over-consumption increase.
Therefore, during the installation of the trunk in the wall, floor or under the ceiling, it is important to insulate the pipe with any heat-insulating material.
The choice of radiators and pipes
Polypropylene pipes are easy to install, but are not suitable for houses located in the Northern regions. Polypropylene melts at a temperature of + 95 ° C, therefore, the probability of a pipe rupture increases with a maximum heat transfer from the boiler.
It is advisable to use exclusively metal pipes, although their installation is accompanied by difficulties.

The metal pipeline is considered the most reliable. It withstands high temperatures of the coolant, but welding is necessary for its installation.
When choosing a pipe diameter, the number of radiators must be considered. A trunk with a diameter of 25 mm and a bypass of 20 mm are suitable for 4-5 batteries. For a circuit consisting of 6-8 radiators, a 32 mm line and a 25 mm bypass are used.
If the system involves gravity, it is necessary to choose a highway of 40 mm and above. The more radiators are involved in the system, the larger the diameter of the pipes should be, otherwise it will be difficult to balance later on.
The number of sections of radiators is also important to correctly calculate. The coolant, getting into the first radiator battery, has the highest efficiency. In it, water is cooled by at least 20 degrees. As a result, at the outlet, water with a temperature of 50 degrees is mixed with a substance with a temperature of +70 degrees.
As a result, the coolant with a lower temperature will get into the second radiator. Passing through each battery, the temperature of the medium will drop lower and lower.
To compensate for heat loss, to provide the necessary heat transfer for each battery, it is necessary to increase the number of sections of radiators. For the first radiator, 100% of the power must be taken into account, for the second - 110%, for the third - 120%, etc.
When choosing heating radiators, we recommend that you adhere to the tips given in this article.
Connection of heating elements and pipes
Bypass is built into the existing highway, manufactured separately with bends. The distance between the taps is taken into account with an error of 2 mm, so that the radiator fits during the welding of angle valves with an American.
The allowable backlash on pulling up an American is usually 1-2 mm. If you exceed this distance, it will go downhill and flow. To get the exact dimensions, you need to unscrew the angle valves in the radiator, measure the distance between the centers of the couplings.
Tees are welded or connected to the taps, one hole is allotted for bypass. The second tee is taken by measurement - the distance between the central axes of the branches is measured, taking into account the size of the bypass fit on the tee.
Welding
When welding, if the pipes are metal, it is important to avoid internal influx. If half the diameter in the pipe is closed, then the coolant under pressure will prefer to go along a more spacious line. As a result, radiators may not receive enough heat.

If an influx has formed during welding of elements, it is necessary to redo the work immediately, welding the elements again
When welding the bypass and the main pipe, it is necessary to determine in advance which end must be welded first, since there are situations when, by welding one edge, it is impossible to insert a soldering iron between the pipe and the tee.
After all the elements are ready, the radiators are hung with the help of angle valves and combined couplings, laid in a bypass with taps, measure the length of the bends, cut off the excess, remove the combined couplings and weld to the bends.
Final moments of work
Before starting the system from the pipeline and radiators, it is necessary to remove the air using Maevsky cranes.
Also, after starting and checking all the nodes and connections, it is important to balance the system - equalize the temperature in all radiators by adjusting the needle valve.
In vertical schemes, water is supplied from above along risers. The expansion tank should be located above the level of the radiators, and the pipe is usually mounted in the wall. It is also important to implement a forced circulation device in the system.
Advantages and disadvantages of the system
The main advantages of Leningradka are ease of installation, high efficiency, savings on consumables, installation (a strob is formed for one pipe or not at all if an open installation type is selected).
Thanks to the introduction of bypasses, ball valves, and a control panel, it became possible to regulate the temperature regime in rooms without lowering the heat level in other rooms; to replace, repair radiators without stopping the system.
The main disadvantage of the system is the complexity of the calculations, the need for balancing, which often translates into additional costs - installation of additional equipment, repair work, etc.
Cognitive video about the implementation schemes of the Leningradka system:
Called the “Leningradka” heating system is a budget efficient solution for heating houses of a small area.
There is something to supplement the above material or questions have arisen on the topic - please leave comments on the publication, share your personal experience in arranging Leningradka. The contact form is located in the lower block.