When repairing the bathroom, you may need to transfer the heated towel rail to another wall with a change in the location of the water pipes. The complexity of the work depends on the type of coil.
If you do not need special skills to transfer the electric unit, then when you connect a heated water towel rail, you may need the help of a plumber.
We will understand what is the sequence of actions in a given situation, and also designate the rules for the placement and installation of different types of coils.
Features of mounting an electric model
If the owners of private houses independently choose where to place this element, then residents of apartment buildings are often deprived of a choice, since in their apartments appliances are placed in bathrooms according to the original plan.
Often places for heated towel rails are chosen very uncomfortable, for example, above the sink. In this case, at the first repair or redevelopment, the owner of the apartment will have the idea to transfer the device to a more comfortable place. But how to do it by all the rules, with the least damage to the bathroom and without unpleasant consequences?
Carrying an electric heated towel rail does not cause any difficulties - it happens much easier than in the case of analogues of the water type. It is also not required to coordinate the transfer of the electric model with documents, since in this case no types of communications will be affected.

There are only two conditions that must be met for proper transfer or initial installation: a distance of at least 60 cm from water sources and proper power supply
An electric heated towel rail is considered more practical than water, not only because of the ease of installation, but also because of its ease of use.
The advantages of electric dryers:
- Year-round operation. The closed circuit of electric dryers allows you to operate them all year round, even when the heating system is turned off or hot water is not supplied due to preventive maintenance.
- Wear resistance. Electric appliances are not afraid of pressure drops, hard water and corrosion.
- Ability to adjust the heating temperature. To do this, you only need to additionally install a rheostat, in some models it is present initially.
That is why many owners for the arrangement of the bathroom prefer electric to water heated towel rails.
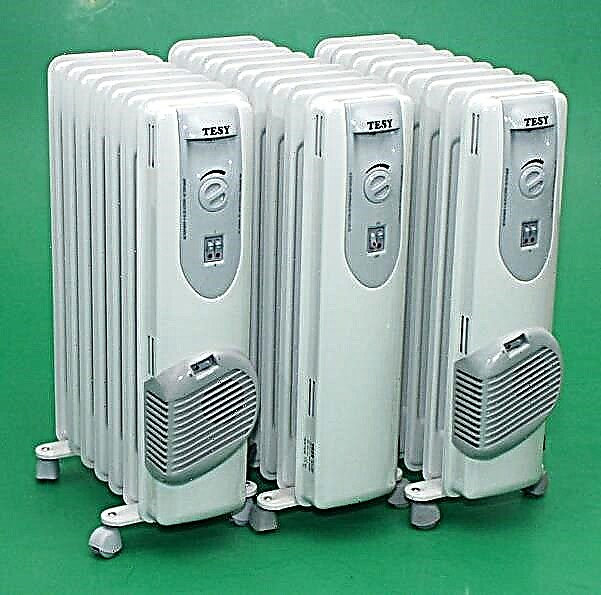
There are different types of electric heated towel rails on the market - there are dry and oil models. In liquid, as a rule, tubular electric heaters are used.

In dry type devices, instead of liquid filler, a special silicone heating cable is used, like those of which the system is installed underfloor heating
In order to ensure the normal safe operation of electric dryers, you need to adhere to several rules:
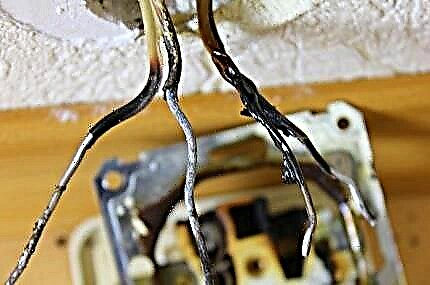
- wiring must be qualitatively hidden in the wall;
- it is advisable to install a residual current device on the wiring to the bathroom, ideally on the heated towel rail itself;
- ground the device, as it is located in a room with high humidity;
The outlet for the device, like any outlet in the bathroom, must also be grounded and have a degree of protection IP4 or IP65 (from dust or from direct jets of water and dust).
Instructions for moving the appliance
After we have considered all the nuances, we can proceed directly to transferring the heated towel rail to the bathroom or toilet.
To work, we need the following tools:
- hammer drill or hammer drill;
- concrete drills;
- screwdriwer set;
- set of wrenches;
- electrical tester;
- tape measure, marker;
- mounting brackets on the wall.
First of all, decide on the place where the dryer will be located.

The appliance must be located at a distance of at least 60 cm from water sources, at least 95 cm from the floor, 30 cm from the edge of the wall and 75 cm from the furniture. For proper measurements, arm yourself with a tape measure. When a place is selected, mark with a marker for fasteners
If there is a power source near the selected location, the whole process will be as simple as possible. If there is none, the task will become more complicated, since it will be necessary to lay a separate wire. This can be done in two ways: under the lining or on it.
If you make repairs in the bathroom and change the cover, feel free to use the first option - although it is more time-consuming, it provides reliable wiring shelter.

If the cladding is already laid, it is not logical to remove it. In this case, the cable is conducted over the lining, covering it with a plastic cable channel, and use a socket with maximum protection against moisture. When installing the wiring, do not forget to ground the outlet
Then we dismantle the device from the old place. This work, as a rule, does not cause difficulties. First we remove the device, then with the help of screwdrivers we remove the fasteners.
The next step is the installation and connection of electric drying. On the wall, prepare the holes for the fasteners and install the holders. Next - we fix the brackets and mount the device on them. At the end we make finishing work.
If the cable was laid on the cladding, no additional finishing is required.
How to outweigh a heated towel rail?
Moving a water-type heated towel rail is a much more time-consuming process than with the electric version. But, having the skills and the necessary tools, you can transfer the water device to another wall yourself.
Image Gallery
Photo from
The technical essence of carrying a heated towel rail is to extend the pipelines to the place of the upcoming placement
A common reason that drying is carried out is the transfer of plumbing in the bathroom or the installation of new designs
The dryer coil is often moved during the redevelopment of the apartment. For example, if the bathroom is divided into two independent rooms, in one of which there is a riser, and in the other drying
Rearranging a water dryer is often required due to the installation of a shower cabin, for which it is difficult to find a place in a typical bathroom
Towel dryer transfer is done if you want to allocate a special place for the design device and emphasize its style
Towel dryer is also transferred if it is disconnected from the hot water supply and connected to the heating circuit
Significant prerequisites for installing the device in a new place are the mistakes of the designers, as a result of which the drying does not have the required temperature due to the too long pipeline route
The transfer of the heated towel rail is necessary if the appliance corrupts the normal operation of the functional compartments, furniture and sanitary ware in bathrooms and toilets
The essence of the transfer of water heated towel rails
Transfer of plumbing fixtures in a bathroom
Removal of the device to an adjacent room
Purchase and installation of a shower cabin
Designer bathroom fixture
Transfer and connection to the heating system
Design bug fixes
Interference with normal operation
Design and connection methods
Water-type towel dryers have the following design features:
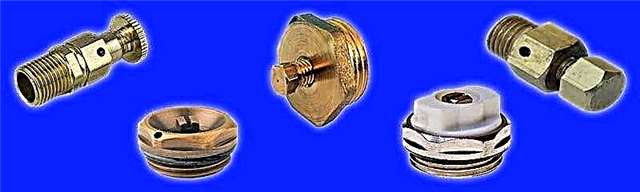
- air bleed valve - the Mayevsky crane is located on top;
- special plug - plug;
- water supply system;
- valves for shutting off water - in some models are mounted in the device itself, often installed separately;
- brackets for fixing and hanging on the wall.
Water heated towel rails can operate from a heating system or from a hot water system.

The option of connecting a heated towel rail to hot water pipes using special fittings - couplings and elbows (with and without bypass) (+)
It is preferable to mount the radiator by tapping into a hot water supply system, there are several reasons for this:
- The heating system works a little more than half a year, the remaining 5-6 months the batteries are not provided with heat and, accordingly, do not fulfill their main functions.
- In case of leakage of the coil and other breakdowns, the hot water supply system is very easy to shut off, which can not be said about the heating system, which is very difficult to shut off.
- The water supplied to the taps is much cleaner than the water in the heating systems, in addition, it manages to stagnate for several months of the heating season, which significantly increases the risk of corrosion.
Before starting work, it is necessary to draw up a documentary agreement with the housing and operating authorities. Independently moving any heating appliances, including a heated towel rail, leads to a change in the technical parameters and condition of the heating system.
In case of problems, the responsibility lies with the owner of the house, so it is very important to agree on any changes at the documentary level in advance.
There is one more nuance - for work you will need to completely turn off the water on the entire riser and drain it, and for this you need to call a specialist from the housing department.
Terms of use of the new model
When choosing a water coil, you must adhere to a number of rules:
- The technical parameters of the selected model should correspond to the pressure level of the water supply system of the house. Operating pressure can range from 2.5 to 7.5 atmospheres. The indicator depends on the floor, the state of communications, even the time of day - at night the pressure rises.
- The size of the device should fit the size of the bathroom - the smaller the bathroom, the smaller the heated towel rail, with fewer knees, you need.
- The diameter of the outlet pipes of the device must correspond to the size of the inlets in the pipes of the riser. If the parameters do not match, you can use special jumpers.
If possible, choose a seamless heated towel rail with protection against water shocks.
The following materials and tools will be required for the technical work of moving the heated towel rail:
- mounting brackets;
- polypropylene pipes;
- Bulgarian;
- welding machine;
- pipe cutter or nippers;
- wrench and adjustable spanner;
- level;
- Ball Valves;
- thread cutting machines;
- linen winding or fum tape;
- connecting fittings.
After completing the preparatory phase, we proceed to the installation work.
Rules for dismantling the heated towel rail
For dismantling, first of all, we shut off the main riser and drain the water from it. As mentioned earlier, this will require the presence of a specialist from the housing department.
Also, do not forget to warn the neighbors about turning off the water so as not to spoil the relationship once again. The process itself will take a couple of hours.

After draining the water, we proceed to dismantle the equipment. First, cut the bottom pipe, then the top. Make sure that the remaining sections are long enough to snap a new pipeline
To do this, you need a grinder and an assistant. One person will cut the dryer, the other will support it, otherwise you can drop the appliance on yourself and get seriously injured. After trimming the inlet and outlet pipes, the device can be freed from the fasteners and taken out of the room.
Arranging a riser and piping
After dismantling the old heated towel rail, we proceed to work with the riser.

It is advisable to replace the apartment riser and pipes of the entire wiring in the apartment with polypropylene pipes. This item is especially relevant if you are making repairs in the bathroom
An ideal option would be to team up with neighbors and replace the riser pipes. If this is problematic, you can limit yourself only to your apartment.
Thus, you will not only facilitate the connection of a heated towel rail and other plumbing to new pipes, but also in future insure yourself against leaks, breakdowns and other troubles with outdated pipes.
Professionals advise using polypropylene pipes with a diameter of 25 mm.
Working process:
- To lay the riser pipe to a new installation site, specialist assistance may be required, especially if the distance is large. A competent engineer will not only advise you on the correct installation of pipes, but also carry out the necessary hydraulic engineering calculations. Do not neglect the help of professionals, as an improperly installed device will not heat up and can lead to an emergency.
- We clean the places of cuts at the ends of the pipes so that there are no burrs and traces of old paint.
- We cut the thread. For this we use lerka. Pre-lubricate with oil, put on the machined edge of the pipe and begin to cut the thread by carefully turning the tool. Alternatively, you can use welding instead of a threaded connection, but this will require a welding machine and skills to work with it.
- On the finished thread, you can install "American" - a special fitting that is needed to connect the system with propylene pipes.
- To prevent water leakage, we seal all joints on threaded joints with a fum tape or, as usual, with linen winding and sealant. Choose the method of your choice.
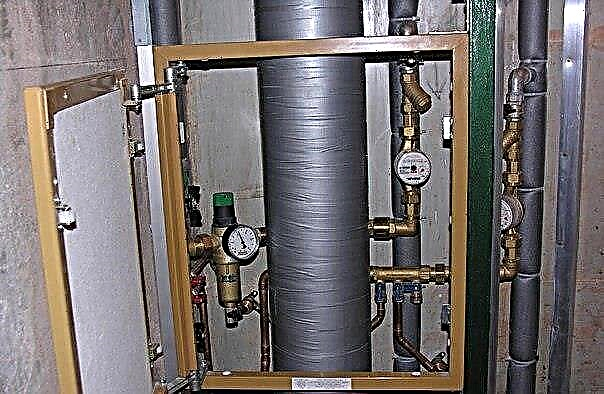
To facilitate the maintenance of the heated towel rail, it is better to mount it on a special jumper - “bypass”, and also use ball valves to redirect the flow of water to the jumper.

Thanks to a simple system in the future, you can easily remove the device, carry out repairs, change gaskets. The bypass is made of a small section of pipe whose diameter is one size smaller than that of the main line (+)
We check the system for operability, the presence of defects by starting up hot water supply. If everything suits you, we fix the heated towel rail using brackets and do the finishing work.
It is advisable to deepen the pipes into the wall or hide under decorative trim. This is a rather time-consuming process, but the end result looks much more advantageous. For free access to the riser, it is recommended to make a special plastic window.
Practical tips and tricks
To carry out the transfer of a heated towel rail in the bathroom in accordance with all the rules and get a good long-lasting result, you should adhere to some rules.

For an apartment building (especially for high-rise buildings), it is better to purchase a steel heated towel rail from a seamless pipe. This is due to the increased pressure of the water in the system and to water hammer - pressure surges in the system caused by a change in the fluid flow rate
For private houses with autonomous water supply, brass models that are designed for more careful operation are suitable. It is undesirable to install a heated towel rail on a wall bordering the living room.
It is not recommended to use a threaded connection in combination with a welded riser. It is also undesirable to use a threaded connection in places difficult to access for maintenance, for example, behind a decorative finish.
For correct operation of the heated towel rail, during installation, ensure a slight slope of the supply pipe towards the flow of hot water. This will help to prevent air clogging.
The distance from the wall to the middle of the supply pipe should be 3.5-5.5 cm
A few tips from an experienced builder:
Carrying a heated towel rail in the bathroom is a rather complicated process. You need to approach him with full responsibility.If you are not confident in your abilities or do not have enough experience, it is better to contact professionals, otherwise amateur activity may result in the inoperability of the device or lead to an emergency.
If you are not a beginner in engineering, you can count on your own strength, experience and good instruction. Alternatively, you can purchase an electric model and make your life easier, but lose in terms of paying electricity bills - it all depends on personal preferences.
Share with your readers your experience of transferring and connecting a heated towel rail. Please leave comments on the article and ask your questions. The feedback form is located below.