The initial task of the provider is to install a modem / router and connect the consumer to the network. Usually installation work is free of charge, but further assistance from company representatives has to be paid.
In order to not make a call when connecting a new device, breaking down or creating an internal network, you need to learn how to compress the Internet cable at home. Consider the main methods and schemes of crimping wires with RJ-45 connectors.
When can the RJ-45 crimp come in handy?
The technology is constantly being improved, new devices are added that are connected to the Internet. If at home there is a large piece of network cable and a crimping tool, you will not have to purchase expensive patch cords or call a specialist each time.
The proven cable manufacturing procedure takes no more than 5 minutes.
Here are a few situations for which the ability to compress is useful:
Image Gallery
Photo from
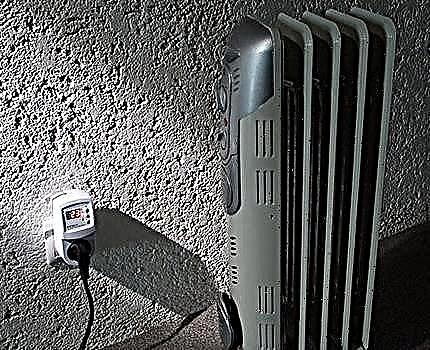
If the amount of equipment in the house increases, usually a new device is simply connected via Wi-Fi. But this connection has its drawbacks - for example, it is weakening due to the large distance or capital walls. The wire connection is much more reliable and more stable.
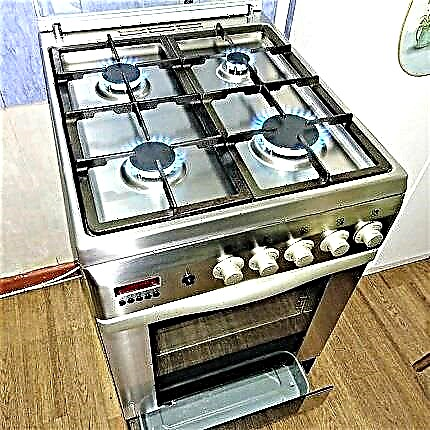
Some modern expensive household appliances, such as refrigerators and most televisions, are equipped with an additional option - Internet access. IP-TV connections are also made through a network cable
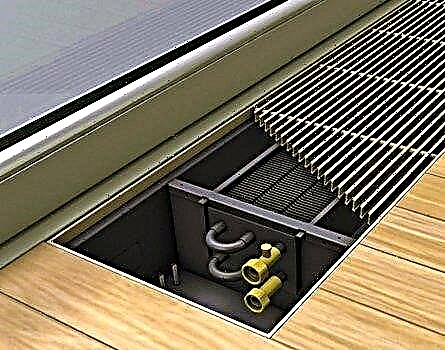
The devices in the apartment network are interconnected either directly or through a network switch. The interaction often occurs in the most reliable way - by connecting wires that need two-side crimping
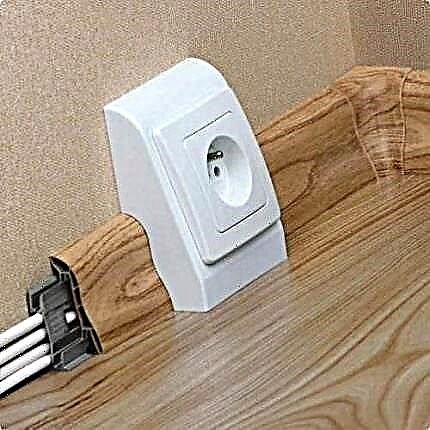
It’s easy to break the connector - just step on it with your foot. If the wires or plugs are not protected and not hidden in the cable channels, they are often bent, frayed, frayed. Particularly active pets - cats, puppies, rats, hamsters - manage to cut through a thick wire in a couple of seconds
Connecting a new device - computer or laptop
Technique with access to the Internet
Multiple PC internal home network
Internet cable is down
If you urgently need to prepare a project or complete a thesis, and the cable has become unusable, sometimes only your own skills help out. Especially if the trouble happened late in the evening, when all the shops are closed, or you are far from the city.
All situations related to twisted pair cable cannot be foreseen, therefore it is better to know in advance how the LAN cable is arranged and how it is crimped.
Materials and tools for work
To make a full-fledged and functioning patch cord with your own hands, you will need a piece of network cable, which is also called a twisted pair cable, and connectors, in some cases 1 connector.
You cannot build a patch cord with your bare hands, for this you need special crimping press pliers (crimper) and stripper - a device for removing insulation. Consider what they are.
Twisted pair internet cable
The name "twisted pair" is fully true. If you remove the insulation polymer from the cord, beneath it, find 2 or 4 pairs of wires twisted in a spiral that differ in color.

The diagram shows a standard twisted pair, which is used for self-crimping. Under the insulation there are 4 pairs of wires twisted in color: blue with white-blue, orange with white-orange, etc.
But you should not think that this is the only type of network cable.
In fact, three options are actively used, each of which differs in the degree of protection:
- UTP - a simple product in a polymer shell without shielding, suitable for constructing home networks and connecting devices to routers and switches;
- FTP - a cable whose sheath is reinforced with foil; shielding protects against external interference and helps if a power line passes nearby;
- STP - a cable with two degrees of protection, in addition to the common foil sheath, each wire has a second, individual one.
The first option is the cheapest and most common. The second one makes sense to buy if the Internet wires are laid in one strobe, cable channel or baseboard with power communications.
The third, the most expensive and protected, is not used privately. It is used at manufacturing enterprises, in large communication centers and other "serious" organizations.

Schematic illustration of an FTP cable. If the usual UTP cable is limited in length, otherwise the signal disappears, the product with double protection is pulled over a distance exceeding 100 m
All of the above options can be 1-core and multi-core. The former do not differ in good flexibility, but they hold the signal stably, they are often used to connect electrical installations - Internet outlets.
The second, more elastic, is used for switchable cords, although it is more difficult to crimp them.
And another quality that characterizes the bandwidth of the wires is the category. It is usually indicated on the insulating layer.

Internet wire category table. For home communication networks, they use the 5th category, that is, UTP Cat 5 and Cat 5e with a data transfer rate of up to 100 Mb / s and 1 GB / s, respectively
Thus, if you plan to conduct Internet communications separately from the power line, the most inexpensive but dynamic option is suitable - UTP sat 5e.
Connector and its device
Ethernet-plug, which is inserted into the jacks of PCs, televisions, routers, communicators, sockets and other devices, and there is a connector. It has two commonly used names - Rj-45 and 8P8C. A connector device for the Internet seems simple if you know what its elements are for.

Connector design: 1 - transparent plastic case; 2 - fixing latch; 3 - cable input; 4 - fixing crimp bar; 5 - channels for veins; 6 - contacts made of brass or bronze; 7 - knife ledges
Brief description of the crimping process: the conductors disassembled in a specific order are inserted into the inlet and distributed through the channels, then the connector is inserted into a special socket of the press tongs and clamped.
The following happens: the clamping bar lowers onto the outer insulation and firmly fixes the cable. Knife protrusions of the contacts cut the insulation of the cores, which ensures the electrical connection of the contacts with the conductors.
At the same time, the external parts of the contacts are flushed into the housing - as a result, a plug is obtained for switching with the ports of network devices.

The cap, which is put on the network cable and connector, protects the connection and prevents it from “pulling off” when the cord is often switched from one socket to another
In addition to simple RJ-45 connectors, you can find products with a thin insert that guides the wires into the desired channels. For shielded communications, the same shielded plugs are intended - they can be recognized by the metal finish.
Twisted Pair Crimping Tool
If you want to thoroughly prepare for the crimping procedure and arm yourself with all the necessary tools, then get:
- crimper (ticks);
- stripper (nippers);
- tester;
- crossover device.
A stripper differs from a conventional construction knife in that it carefully removes the protective sheath from the wires, cutting only the polymer insulation and without damaging the wires. Read more about wire stripping technology in this article.

Crimper can be either special or multifunctional. The second option, in addition to sockets for RJ-45 connectors, can also have telephone jacks RJ-11, RJ-12. Often such pincers have built-in cutting pliers
A cable tester is necessary to verify the correct connection of the connectors and the health of the line.
The presence of problems is reported by the red glow of the LEDs, if everything is normal with the connection of the conductors - green.

For convenience, you can purchase a tool kit - it will cost less than buying devices separately. In addition to the items listed, a set may include screwdrivers, connector packs, a network probe, etc.
The crossover tool is not involved in the manufacture of a patch cord, it is necessary when you need to connect the network cable to a patch panel, plinth, socket or cross. Usually it is used by specialists when working with a switchboard. In fact, its presence is optional.
Overview of Crimp Circuits
The correct operation of the wire provides a certain arrangement of cores in the connector. There are two main pinout schemes for an 8-core cable and one more for a 4-wire cable, which almost no one uses.
If the switching device - a router or a switch - needs to be connected to a PC, laptop, monoblock, then direct pinout is required. When directly switching two computers - cross (kross-over).
Both circuits are numbered:
- straight - 568V;
- cross over - 568A.
It is better to learn the location of the wires in both cases, since both circuits can be useful for home use to create an internal network.

Direct scheme. Wires in the process of crimping both connectors are located the same way, as if in a mirror image. The order of the conductors and their color ratio are important
Do not swap wires. If orange and white follow orange-white, then neither blue, nor green, no other should be connected - the cable will not work.
But there is one point - orange and green wires are interchangeable, that is, under No. 1 there can be white-green, then green and so on.

Cross pattern. More complex and requires memorization, since the conductors are connected not just in the opposite, but in a special order, and the position of some remains “direct”
If suddenly instead of the popular 8-core cable you have to crimp a 4-core cable, used only for connecting peripheral devices, then a completely different circuit will be required.
When using the same connectors, the order of connecting the conductors changes.

Direct pinout diagram for 4-wire cable. A feature of the connection is that some tracks remain free. Contacts 1-3 and 6 are active; only orange and green conductors work
Contact numbers are stamped on the connector, they must be taken into account when installing wires. In order not to mess with the order of arrangement, it is enough to find the number 1 or 8.
Read more about crimping twisted pairs into 8 or 4 cores.
RJ-45 Correct Crimping Instructions
It is better to study the theoretical part even before you start crimping the RJ-45 connectors with your own hands, so that you do not have to redo it later.
For training, you need to stock up on tools, patience and squeeze a few Internet forks. If the trial patch cord is working, in the future you can easily cope with the manufacture of Internet cords.
Option # 1 - Straight Direct Connection
This is the main procedure that should be worked out, since the connection of a stationary PC or laptop with a router occurs more often than other types of switching.
It is on this scheme that you can get your hand in the remaining cases, you will only have to swap the wires.
Image Gallery
Photo from
Cut a piece of network cable of the required length, take out 2 Internet plugs and position the tool so that it is at hand
Using a stripper, we cut the protective shell and remove it. The length of the released conductors is 1.5-2 cm
The pairs of cores must be separated by color (brown with white-brown, blue with white-blue, etc.) and arranged for convenience in the form of a cross
Each pair must first be untwisted, and then the individual conductors straightened, so that then they are distributed in order
We arrange the elongated wires according to the direct connection scheme - from white-green to brown
Before inserting into the connector, the wires need to be trimmed - cut off uneven excess with pliers. The length of the resulting blank without a shell - with the width of a finger
We insert the aligned and cut wires into the connector so that the white-green gets into the first track, and the rest - each in its own
We also move the insulation to the maximum inside the connector, insert the plug into the groove of the crimper and crimp it with a strong but accurate squeeze
Step 1 - preparing materials and tools
Step 2 - removing the cable sheath from the cable
Step 3 - dismantling lived "cross"
Step 5 - assembly of wires according to the scheme
Step 6 - remove excess tips
Step 7 - installing the cores in the connector
After the procedure, if the crimping is carried out correctly, the wires can not even be pulled out of the connector with effort. The cable holds firmly inside thanks to the clamp of the part covered with insulation.

After the first connector, we compress the second one - according to the same direct connection scheme. The result should be a working cable of the desired length with two Internet connectors at the ends
The operation was performed without the use of caps; if you decide to use them, then put them on the cable before starting crimping.
After crimping, pull the wide end of the cap onto the connector, the narrow end remains on the cable.

To check the health we use a tester. We connect the ends of the cord to different parts of the device. If the cores are crimped correctly, green lights will alternately light up.
If an error is detected, the diode light will change from green to red. This may indicate that the conductors are confused or that there was an "incomplete" somewhere.
Option # 2 - Cross-Over Connection
If you decide to connect one computer to the router through another, that is, connect two personal devices directly, you will need a cross-over scheme.
It differs from the previous one only in the arrangement of wires by color - the order of conductors on the second end is not the same as on the first.
Image Gallery
Photo from
Step 1 - assembly of cores and crimping of the first connector
Step 2 - cross-over wire assembly
Step 3 - crimping the conductors
Step 4 - checking the results
By the way, fresh technical trends can lead to a complete rejection of such sophistication as a complex cross-connection scheme.
Already many modern digital devices are equipped interface of the new Auto MDI-X standard. The system independently, automatically determines the type of connection and selects the switching mode that it considers optimal.
This means that it is enough to perform a direct connection - then the technical device will do everything on its own.
Option # 3 - crimping a four-core cable
The main difference of the connection is that only 4 out of 8 conductors are involved in the process. The functional difference is in reducing the signal feed rate.
Image Gallery
Photo from
We remove insulation by 1.5-2 cm, we separate only 4 working cores. In this case, these are wires of green, white-green, orange, white-orange
We collect the conductors in order - from white-green to orange, then cut them with wire cutters to the thickness of a finger
In the first three tracks, in order, we start white-green, green, white-orange wires, and in the sixth - orange
Using a crimper, crimp the connector. We perform the same actions with the second end of the cable - the connection is also direct type
Step 1 - Stripping and Separating Conductors
Step 2 - assembly according to the scheme and cutting
Step 3 - vein distribution along the paths
It turns out that 4 conductors work, and 4 more remain free. They can be cut or simply tucked so as not to interfere.
Crimping without the use of press pliers
It’s not always at hand that there is a special tool, so we’ll further consider how to squeeze a piece of an Internet cable yourself without a crimper.
An alternative to press ticks will be the main tool of labor - ordinary flat (slotted) screwdriver.
Image Gallery
Photo from
If there is no special mounting tool - a stripper, then an ordinary stationery knife can be used to cut off the insulation. Carefully cut the polymer shell, without touching the cores, expose the conductors
We unwind the conductors, distribute them by color, and then straighten each core. For laying in the connector you need to use a certain scheme - usually direct connection
Before inserting the cores into the tracks intended for them, we lay the wires in order. We try on the length and cut it so that, in addition to the conductors, a part of the wire with insulation enters the connector
Carefully insert the prepared conductors into the grooves, trying to push them to the end. Press the cable tightly, insert the edge of the insulation inside
It is inconvenient to deepen the protruding parts of the contacts with a screwdriver - it will slide off, so first push them inside the case with narrow pliers
When crimping with a pliers or screwdriver, the following occurs: the knife parts of the contacts come into contact with the conductors and cut their insulation, as a result of which electrical switching occurs
The contacts sold by the narrow-nose pliers did not completely break through the insulation of the conductors, so you need to use a screwdriver. We insert it alternately into each contact groove and press it with all our might, but carefully
Finally, you need to securely fix the cable, for this, use a screwdriver to press the partition with all your strength. When correctly executed, the wire stops moving in any way relative to the Internet plug
Step 1 - Remove Isolation
Step 2 - wire distribution
Step 3 - Cutting Conductors
Step 4 - installing the cores in the connector
Step 5 - punching contacts with narrow pliers
Step 6 - the principle of operation of the crimping device
Step 7 - crimping the contacts with a screwdriver
Step 8 - partition for fixing insulation
This method is longer and more laborious than crimping with press pliers, but for the lack of a special tool it justifies itself. A properly crimped cable works no worse than a purchased analogue.
We also recommend reading the article where we talked about the best ways to connect twisted pair to each other. More details - follow the link.
Detailed video tutorial on crimping the network cable:
Clothespin, screwdriver, sharpener - an alternative set for crimping:
Why is it important to follow the color arrangement:
Everyone can learn how to crimp the Internet wire, for this you do not need to qualify or have a special talent. It is enough to understand the device of the cable and connector, learn a couple of schemes and purchase special crimping pliers.
Having developed the skill on the home network, you can help parents, neighbors and your friends, freeing them from problems with Internet communications.
If you had to deal with crimping Internet wires repeatedly, please share your experience with our readers. Perhaps you know the subtleties that we did not take into account in our material? Write your comments under the article.